Copying Statistical
Software Output into Word as an Image
as
Applied to Various Text-Based Data from Minitab, SPSS, and SAS
Open and Prepare a Word File
1. Open a Word file.
2. To widen the text area, choose File, Page Setup from the menu bar and select the Margins tab.
. . – Set the left and right margins to 0.5”. Click OK.
3. To better view the placement of your images on the page, choose View, Page Layout.
4. To view the text boundary and hidden characters, choose Tools, Options and select the View tab.
. . – In the Show section, select the Drawings, Object Anchors, and Text Boundaries check boxes and clear the Picture Placeholders box.
. . – In the Nonprinting Characters section, select the All check box. Click OK.
Copy the Output from the Stat Program into Word
1. In the stat program, select (drag the cursor to highlight) the output you wish to copy. (In SAS, optionally choose Edit, Select All.)
2. From the menu bar, choose Edit, Copy.
3. Return to the Word file.
4. From Word’s menu bar, choose Edit, Paste Special and select Formatted Text (RTF) *. Click OK. The text flows into the file.
. . – You can leave the text as is or delete unwanted sections.
. . – You can move outlying items such as page numbers and dates closer to the center.
. . *
Note: Depending on the data you’re pasting, the Picture option may be available now, especially if you’re pasting
semi-graphical data
. . from
SPSS. Therefore, select Picture and click OK. Ignore the next section
and move to “Crop the Image.”
Convert the Text to an Image
1. Select the text you wish to convert, up to 50 or 55 lines depending on the particular font in your stat program.
2. Choose Edit, Copy from the menu bar.
3. Place your cursor where you want the image to go.
4. Choose Edit, Paste Special.
5. Select Picture, optionally clear the Float over text check box (if available), and click OK. The text pastes as an image.
Crop the Image
1. Select the image and choose Format, Picture.
2. Select the Picture tab and adjust the settings in the Crop from section.
OR
1. Access the Picture toolbar by choosing View, Toolbars, Picture.
2. Select the
image (click on it) and click the Crop ![]() button from the toolbar.
button from the toolbar.
. . Note: In some versions of Word, you can access
the cropping tool by selecting the image and holding down the Shift key.
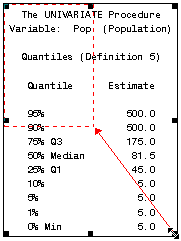
3. To use the tool, drag (click’n’hold+drag) it from one edge toward the center. Refer to the following illustration.
. . 
4. Crop the other side too, as well as the bottom and top if so desired.
Resize the Image
1. Select the image and choose Format, Picture from the menu bar.
2. Select the Size tab and set the Scale: Width and Height boxes to 60% (or some other value).
OR
1. Select the image and pass the cursor over a corner until a diagonal arrow appears.
2. Drag a “sizing handle” from the corner toward the middle of the image. Refer to the illustration below.
. . Caution:
Under certain circumstances, dragging the cursor haphazardly can distort the
image. Therefore, be sure to drag a
sizing handle
. . from
the corner, not from the side, and move the cursor diagonally in a steady
manner.
. .  The image reduces, as shown here:
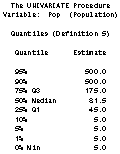
Convert a Floating Image to an Inline Image
Note: In your
version of Word, the Edit, Paste tool
may have automatically pasted the picture as one of two types: “floating” or “inline.” Floating
means you can drag the image around the page, though when you attempt to move
it next to a line of text, the image bumps the text up or down. Inline
means the image sits within a line of text and you can’t move the image around
the page without cutting and pasting.
Furthermore, you can’t place a block of text next to an inline image,
only a single line.
- To convert a “floater” to an inline image:
. . 1.
Select the image and drag its anchor ![]() up or down in the margin until the anchor is
sitting next to a blank line.
up or down in the margin until the anchor is
sitting next to a blank line.
. . 2. From the menu bar, choose Format, Picture and select the Position tab.
. . 3. Clear the Float over text check box and click OK.
. . Note: Depending on your version of Word, the Float over text check box is also located on the Edit, Paste Special menu.
- To convert an inline image to a “floater”:
. . 1. Select the image.
. . 2. From the menu bar, choose Format, Picture and select the Position tab.
. . 3. Select the Float over text check box and click OK.
. . Note: Depending on your version of Word, this step may not work. Therefore, consult the Help menu and search
for Frames.
Place the Image inside a Text Box
When you need an image to float next to a block of text or other images, you can paste the image into a text box as follows:
1. Access the Drawing toolbar via View, Toolbars, Drawing and use the Text Box tool to draw a large-enough text box.
2. Click inside the text box and enter a space (press the spacebar once). Doing so prepares the box for the image.
3. Select the image and choose Edit, Copy.
4. Click back inside the text box and choose Edit, Paste.
5. Drag the edges of the text box until it loosely fits the image, especially if the box was too small and the image disappeared.
6. Move the text box where you want it to be.
. . Tip: To select the contents of a text box, click
on the text or object inside the box.
To select the text box, however, click on its rim.
. . Tip: Another strategy for placing a block of
text next to an image is to place the text, rather than the image, into the
text box.
7. Use the Drawing toolbar to optionally set the text box’s Fill and Line colors to No Fill and No Line.
Place a Border around the Image
1. Select the image.
2. From the menu bar, choose Format, Borders and Shading and select the Borders tab.
. . – Set the line width to ½ pt. or, for a thicker border, select ¾ pt.
. . – Select the line color that you desire.
. . –
Click the four border buttons or the Box ![]() icon.
Click OK.
icon.
Click OK.
OR
1. From the Standard toolbar,
click the Tables
and Borders ![]() toolbar button.
toolbar button.
2. On the Tables and Borders toolbar, set the line width, color, and style you desire.
3. Click the
triangle u
next to the Border button and then click the Outside
Border ![]() button.
button.
. . A
border appears around the image. 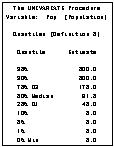
Edit the Image
Caution: Not
all images can be edited, and those that can tend to be troublesome. Therefore, use Word’s image editing feature
only when it is absolutely necessary and keep in mind that you can undo an
error by pressing Ctrl+Z. An alternative to using the image editor is
to make your changes in the original text before converting it to an
image.
1. As a precaution for maintaining the image’s formatting, return the image to its original size:
. . – Select the image and choose Format, Picture from the menu bar.
. . – Select the Size tab, and click the Reset button or manually reset the Scale: Width and Height boxes to 100%. Click OK.
. . – With the image still selected, choose Format, Picture again.
. . – Select the Picture tab, and click the Reset button or manually reset the Crop from levels to 0 (zero). Click OK.
2. To access the image editor, double-click the image and stand by as Word opens the editor.
. . Troubleshooting: If the image distorts, press Ctrl+Z and try again. If the image distorts again, press Ctrl+Z and try another approach
. . via
right-clicking the image and choosing Edit
Picture or choosing Drawing Object,
Edit or Drawing Object, Open from
the pop-up menu.
. . If
Drawing Object is available, the
image is no longer a “picture” and the remaining instructions do not
apply. In such cases, you can proceed
. . intuitively,
consult the Help menu, abandon the editing, or start over from the beginning of
the text conversion process.
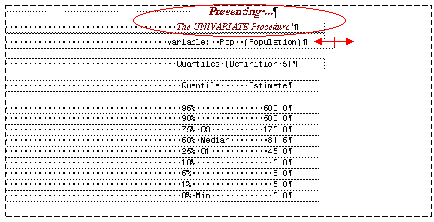
3. In the
image editor, carefully make your
changes. For example, you can add an
introduction, reformat the font, and widen or
. . move a text box as shown below:
. .
4. To close the image editor, click outside the image boundaries or click the Close Picture button if it is available.
. . Note: The editing process may have automatically
converted your “picture” into a “drawing object.” That’s fine; you can still use it.
. . Subsequent
editing, however, can be tricky.
Consult the Help menu.
5. Repeat the steps for cropping, sizing, placing borders, and so on via the Format, Picture or Format, Object menus.
. . The completed image from the above example
appears as follows: 
The information provided
in this document is not guaranteed to be error-free. Furthermore, many of the instructions have been presented in
shorthand form for the sake of brevity, potentially making the procedures
difficult for novice Word users. Such
difficulties were not intended. For
detailed information on how to manage and format images in Word, consult Word’s
Help menu and search for “graphics,” “drawing objects,” “images,” or
“pictures.”
Revision
B Feb. 1, 2000 MPeacock